How to Build Flavor Without a Recipe: The Chef’s Framework for Intuitive Cooking
By Chef Wendell White
Most home cooks treat recipes like a life raft in open water.
If a single ingredient is missing from the pantry, panic sets in. If a step feels unclear, confidence vanishes. We have been conditioned to believe that great cooking is a test of precise memorization—that following instructions line-by-line is the only thing standing between a memorable dinner and a ruined meal.
But when you step into a professional kitchen, you rarely see a chef standing over a printed recipe card.
Chefs don’t memorize thousands of individual recipes. Instead, we master flavor mechanics. We understand the underlying sequence of how ingredients transform when heat, fat, salt, and acid interact over time.
Once you understand how flavor is built layer by layer, you don’t need a recipe anymore. You can open a nearly empty refrigerator, pull out a few basic ingredients, and create a deep, restaurant-quality meal on pure instinct.
Here is the exact framework to stop following recipes and start thinking—and cooking—like a chef.
💡 Quick Summary: How Do Chefs Build Flavor?
Building flavor without a recipe is executing a proven sequence. Chefs build flavor by heating fat, browning proteins to create a fond (browned bits), sweating aromatics, blooming spices, deglazing with liquid, reducing to concentrate, adjusting with acid, and finishing with fresh herbs.
1. The Great Recipe Misconception
The biggest misconception home cooks have about cooking without a recipe is believing it is either a rare genetic gift or pure, reckless guessing.
When people see a chef toss a handful of onions, a pinch of spices, and a splash of wine into a pan without measuring spoons, it looks like magic. But it isn’t wild guessing—it’s technique.
A recipe only teaches you how to make one specific dish on one specific night—assuming you have every single ingredient listed. Understanding flavor mechanics teaches you how to cook anything for the rest of your life with whatever you have on hand.
When I walk into a kitchen with zero recipe in front of me, I don’t start by looking for a formula. I look at my starting point and my destination.
I scan the available ingredients—a piece of pork, a cut of beef, some vegetables, or a container of stock—and I immediately ask myself one question:
“What core technique fits these components best?”
Am I braising low and slow?
Am I searing on high heat?
Am I roasting in a dry oven?
Am I quick-sautéing in a hot skillet?
Once you choose your core technique, the flavor path reveals itself naturally. Technique dictates heat; heat dictates pan choice; pan choice dictates how you layer your ingredients.
3. The 8-Step Sequence to Layering Flavor
Flavor isn’t added at the very end—it is built in stages. If you add all your ingredients at once, your food tastes flat. If you build in stages, every bite has depth.
Here is the exact order I use to build flavor in a pan from scratch:
Fat is the vehicle that carries flavor across your taste buds. Heat the pan first, then add your fat (olive oil, butter, bacon fat, or neutral oil) to coat the surface.
Step 2: Searing & The “Fond”
Sear your protein or hard vegetables in high heat. As proteins brown, they leave behind caramelized, concentrated bits on the bottom of the pan called the fond. This is the foundation of deep flavor.
Step 3: Aromatics
Remove or push aside your protein and drop in your aromatics (onions, garlic, celery, shallots, or peppers). Sweat them out in the rendered fat to release their natural sugars and moisture.
Step 4: Toasting Spices & Pastes
Before adding any liquid, drop dry spices, ground pepper, or tomato paste directly into the hot fat for 30 to 60 seconds. This process, called blooming, wakes up the essential oils inside the spices.
Step 5: Deglazing
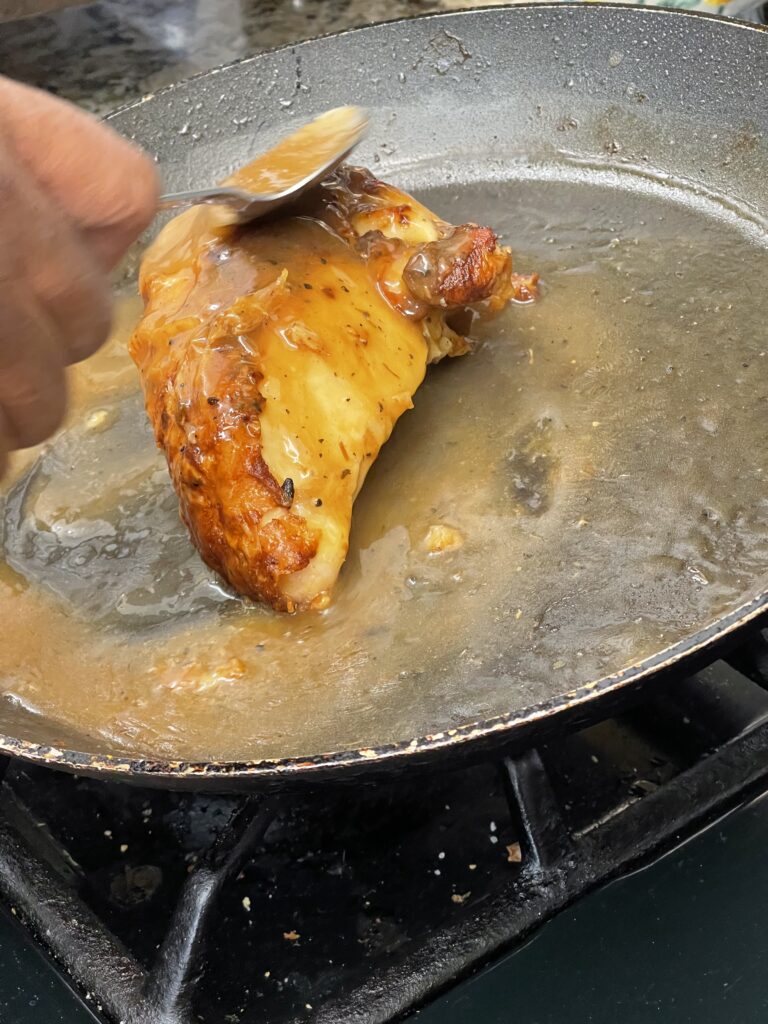
Pour a cold or room-temperature liquid (wine, stock, citrus juice, or vinegar) into the hot pan. Use a wooden spoon to scrape up every single bit of that rich, caramelized fond stuck to the bottom.
Step 6: Reduction & Simmering
Bring the liquid to a simmer. Time and gentle heat evaporate excess water, concentrating the sugars, salts, and savory notes into a cohesive sauce. This is the exact secret behind a rich, slow-simmered Chicken Noodle Soup Recipe.
Technique in action: Basting a roasted chicken breast with a pan reduction—bringing together heat, fond, fat, and concentrated flavor.
Step 7: Acid Adjustment
Right before serving, evaluate the balance. A squeeze of fresh lemon juice, a dash of sherry vinegar, or a splash of red wine vinegar cuts through heavy fats and wakes up sleepy flavors.
Step 8: Fresh Finish
Off the heat, finish with raw fat (a knob of cold butter or a drizzle of extra-virgin olive oil) and fresh, soft herbs (parsley, basil, chives, or cilantro).
4. Reading the Pan: Sensory Cooking Cues
How do you know what step comes next without a timer telling you what to do? You pay attention to the four physical signals your pan gives off.
Sense
What It Tells You in the Kitchen
🔊 Sound
A crisp sizzle = caramelization. A wet bubbling = boiling/steam.
👃 Smell
Raw onion sharpness shifts into warm, sweet caramelization.
👁️ Sight
Watch for the fond to turn rich mahogany (not black/burnt).
🥄 Touch
Watch how a sauce coats the back of a spoon as it reduces.
Sound: A sharp, steady sizzle means moisture is evaporating and a rich crust is forming. A quiet, sloshing bubble means the pan is overcrowded and your food is boiling in its own juice.
Smell: When raw, sharp garlic and onion aromas turn sweet and warm, or when raw spice scents turn deeply toasted, that is your sensory signal to move to the next step.
Sight: Watch the bottom of your pan. You want a deep mahogany brown fond. If it turns black, you’ve gone too far; if it stays pale, you haven’t built flavor yet.
Texture & Viscosity: Pay attention to how a reduction coats the back of your spoon. When a wooden spoon leaves a clean trail across the bottom of the pan, your sauce is ready.
5. The “Dumping” Trap: Why Your Food Tastes Boiled
The most common mistake home cooks make is dumping every ingredient into a cold or lukewarm pan at once.
When you crowd a pan with cold meat, raw onions, garlic, and liquid all at once, the surface temperature plummets. Instead of searing and caramelizing, the ingredients release their internal water and sit there steaming and boiling in their own liquids.
Dumping eliminates any chance of creating a fond. The meat turns gray and rubbery, the vegetables turn mushy, and the final dish tastes muddy, flat, and watery because no single ingredient was allowed to develop its own distinct layer of flavor.
6. The 4 Diagnostic Questions to Ask While Tasting
Chefs taste continuously throughout the cooking process—not just at the dinner table. When you drop a tasting spoon into your pan, ask yourself these four diagnostic questions:
“Where is this flavor hitting my tongue?”If the flavor hits heavy in the back of your throat, the dish is too rich and needs brightness (acid). If it feels thin or non-existent on the tip of your tongue, it lacks structure—read How to Season Food Properly.
“Is it dull despite having good ingredients?”If a dish has great components but still tastes muted, it almost always lacks salt or acid to unlock the flavors.
“Is it too heavy or greasy?”A dish that feels heavy on the palate needs fresh herbs, lemon zest, or a splash of vinegar to cut through the fat.
“Does it just need time?”Sometimes nothing is missing from an ingredient standpoint—it simply needs 10 more minutes of gentle simmering for the flavors to marry and the water to evaporate.
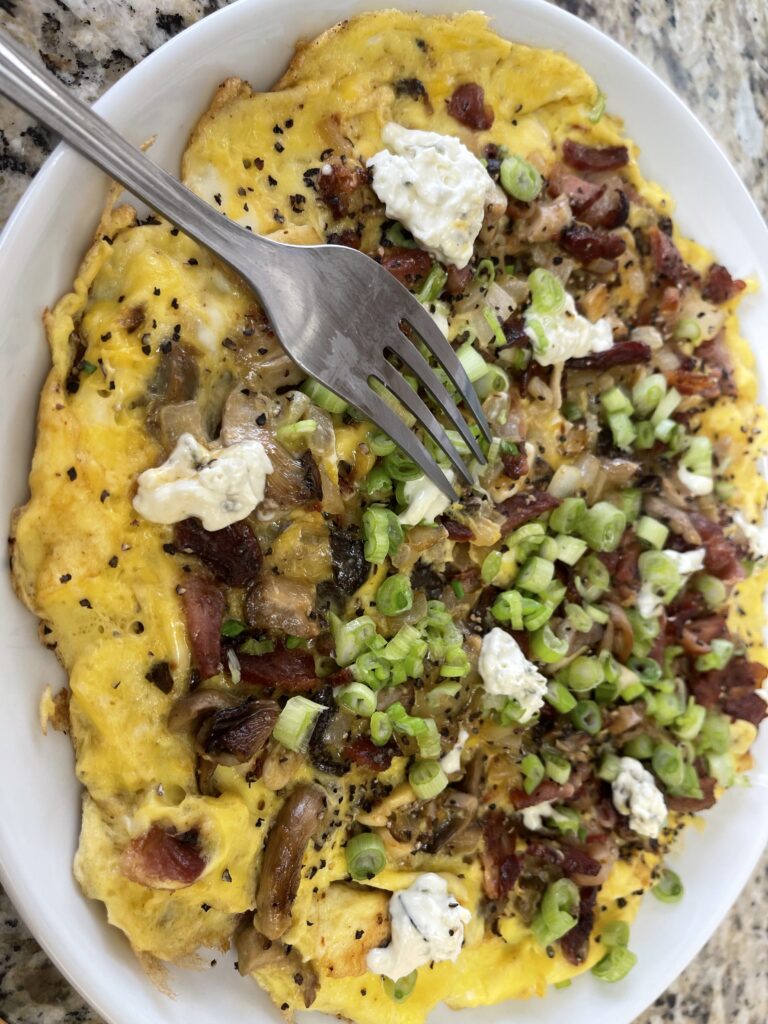
Intuitive cooking at work: A frittata built with distinct layers—seared bacon, caramelized aromatics, creamy goat cheese, and a fresh green onion finish.
7. The Golden Rule of Building Flavor
If I could teach only one lesson about flavor to every home cook in America, it would be this:
Taste as you build, and stop rushing the pan.
Don’t wait until food is plated at the table to taste it for the first time. Season lightly at every layer—when the onions hit the fat, when the meat sears, and when the sauce reduces.
Give your ingredients time to develop a rich, brown crust before you pour in your liquids. Color is flavor. Respect the time it takes to build that color, and you will never need to rely on a rigid recipe card again.
About Chef Wendell White
Chef Wendell White is a veteran chef with over 25 years of professional culinary experience. He is the founder of Culinary Fusion Utah—providing high-stakes private aviation catering across Northern Utah FBOs—and the creator of Chef Wendell Plated Soul, a media platform dedicated to culinary diagnostics, mindful cooking, and empowering home cooks.